I’ve come across a few issues, where a CodeSmith Generator install might become corrupt when going from a beta to RTM. The following guide will show you how to successfully remove CodeSmith Generator from your computer. Please allow 10 to 15 minutes of your time to complete this guide.
Please note: This guide could be used to uninstall other .net applications.
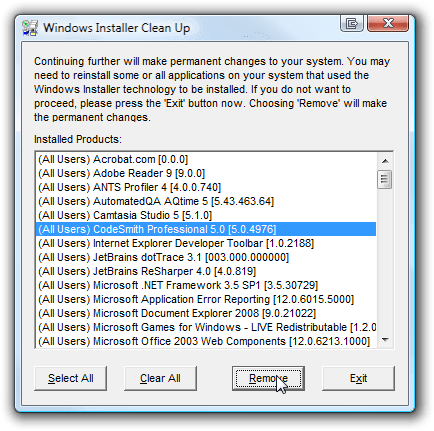
You will need to download the Windows Installer CleanUp Utility. After you have installed this application you will need to launch the following executable:
C:\Program Files\Windows Installer Clean Up\msicuu.exe. After the application is launched you will want to Select CodeSmith from the list and click remove. This will remove CodeSmith from the Installer Database. The installer database holds a record of each application you install on your computer.
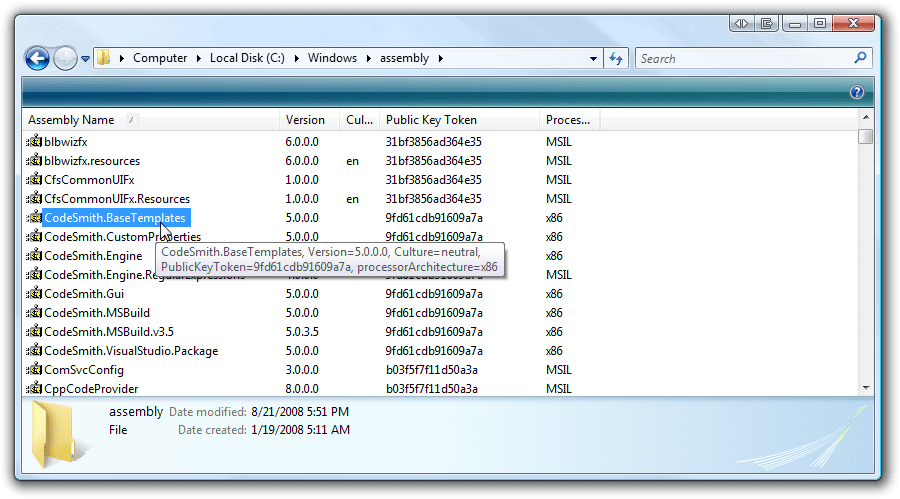
Next we will need to remove all the CodeSmith Generator assemblies that are located in the GAC. Open up Windows Explorer and browse to: C:\Windows\assembly.

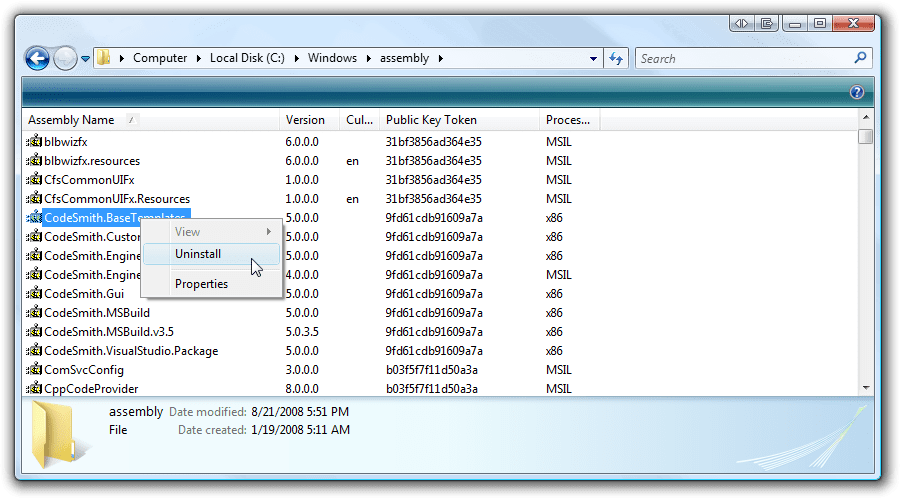
Now you will need to right click all the CodeSmith.* assemblies and select uninstall.

Next we will remove the configuration and program directories. The following directories will need to be deleted, please note the below paths are working paths for Windows Vista.
C:\ProgramData\CodeSmithC:\Users\%USER_PROFILE%\AppData\Local\CodeSmithC:\Users\%USER_PROFILE%\Documents\CodeSmith(If you want to remove your templates).C:\Program Files\CodeSmithC:\Program Files (x86)\CodeSmith(if you’re running 64bit)C:\ProgramData\Microsoft\Windows\Start Menu\Programs\CodeSmith Generator Professional 5.3C:\ProgramData\Microsoft\Windows\Start Menu\Programs\CodeSmith Generator Standard 5.3
You can now install a fresh copy of CodeSmith Generator!

Share this post
Twitter
Facebook
Reddit
LinkedIn
Email